Contact Adhesive Application Guide: Best Practices for Strong Bonds
Step-by-step instructions for applying contact adhesive in industrial settings — surface preparation, application methods, drying time, and troubleshooting weak bonds.
Read More →Technical Guide
Bonding rubber to metal is one of the most demanding adhesive applications in industrial manufacturing. From vibration-damping engine mounts in automotive production to rubber-lined rollers, conveyor components, and sealing gaskets, rubber-metal assemblies are found across virtually every industrial sector. The challenge lies in creating a durable bond between two fundamentally different materials — one rigid and high-surface-energy, the other flexible and often chemically resistant to adhesion.
Selecting the right adhesive for rubber-to-metal bonding depends on the rubber type, the metal substrate, the operating environment, and the required bond performance. This guide covers the major adhesive options, surface preparation methods, bonding procedures, and quality testing protocols used in industrial rubber-metal assembly.
Rubber and metal are dissimilar materials with very different physical and chemical properties. Metals are rigid, have high surface energy, and oxidize readily. Rubbers are flexible, have relatively low surface energy, and contain plasticizers, processing oils, and antioxidants that can migrate to the surface and interfere with adhesion. These fundamental differences create several bonding challenges that must be addressed through proper adhesive selection and surface preparation.
Four main adhesive technologies are used for industrial rubber-to-metal bonding. Each has distinct advantages depending on the application requirements, production process, and performance demands.
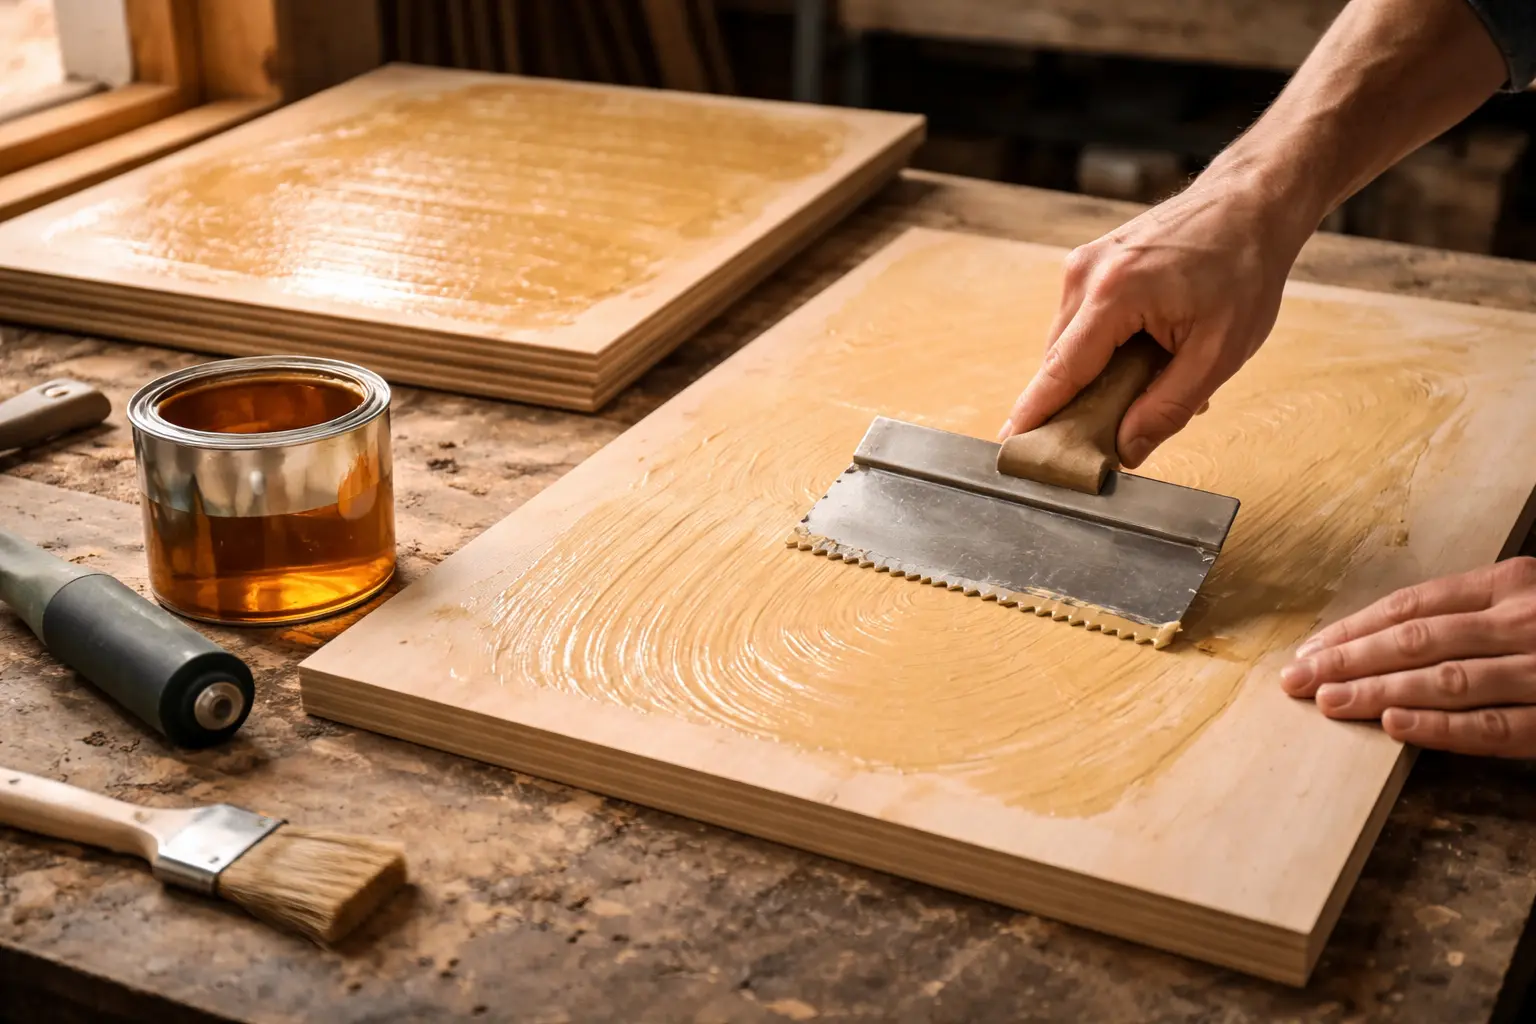
Neoprene (CR) contact adhesive is widely used for rubber-metal bonding in non-structural applications. It provides good initial tack, flexible bond lines, and heat resistance up to 120°C. Neoprene adhesive bonds well to natural rubber, neoprene rubber, nitrile rubber, and most metals after proper surface preparation. It is applied to both surfaces, allowed to dry until tacky, and then pressed together for an immediate bond.
Two-part polyurethane adhesive delivers high bond strength with excellent flexibility and vibration resistance. PU adhesives are the preferred choice for rubber-metal bonds in dynamic applications — automotive mounts, conveyor rollers, and vibration isolators. Bond strengths of 10-20 N/mm² are achievable with proper surface preparation. Cure time ranges from 4 to 24 hours depending on formulation and temperature.
Two-part epoxy adhesives offer the highest absolute bond strength for rubber-metal joints, with shear strengths exceeding 20 N/mm² on properly prepared surfaces. However, cured epoxy is rigid, which makes it less suitable for applications involving repeated flexing or dynamic loading. Epoxies excel in static structural bonds where the rubber component is thick enough to absorb deformation away from the bond line.
Cyanoacrylate ("super glue") bonds rubber to metal quickly — fixture time is typically 10-30 seconds. Rubber-grade cyanoacrylates with added flexibility are available for this purpose. However, CA bonds have limited heat resistance (typically below 80°C), poor resistance to impact and vibration, and degrade with moisture exposure over time. CA adhesives are best suited for light-duty bonds, prototyping, and field repairs rather than production assembly.
| Adhesive Type | Bond Strength | Flexibility | Heat Resistance | Cure Time | Cost |
|---|---|---|---|---|---|
| Neoprene Contact | 5-10 N/mm² | High | Up to 120°C | Instant contact + 24h full cure | Low-Medium |
| Polyurethane (2K) | 10-20 N/mm² | High | Up to 100°C | 4-24 hours | Medium |
| Epoxy (2K) | 15-25 N/mm² | Low | Up to 150°C+ | 1-24 hours | Medium-High |
| Cyanoacrylate | 5-15 N/mm² | Low-Medium | Up to 80°C | 10-60 seconds | High |
Not all rubbers bond equally well. The rubber compound's chemical composition, surface energy, and additive package significantly affect adhesion. Understanding which rubber types you are working with is essential for selecting the right adhesive and surface treatment.
Metal surface preparation is critical for achieving reliable rubber-metal bonds. The metal surface must be clean, chemically active, and have sufficient roughness to provide mechanical anchoring for the adhesive. Metal preparation should be completed immediately before bonding — prepared metal surfaces re-oxidize and attract contaminants within hours.
Remove all oil, grease, cutting fluids, and fingerprints from the metal surface. Use acetone, MEK (methyl ethyl ketone), or isopropyl alcohol applied with a clean, lint-free cloth. Wipe in one direction — do not scrub back and forth, as this redistributes contaminants rather than removing them. For heavily contaminated parts, use a two-step process: initial solvent wipe followed by alkaline cleaning and rinsing.
After degreasing, abrade the metal surface to create micro-roughness that increases the bonding area and provides mechanical interlocking for the adhesive. Use 80-120 grit aluminum oxide sandpaper, Scotch-Brite pads, or grit blasting with aluminum oxide media (60-120 mesh). For large-scale production, automated grit blasting provides the most consistent surface profile. After abrasion, remove all dust and particles with compressed air or a clean solvent wipe.
For high-performance bonds, apply a metal primer after abrasion. Metal primers improve adhesion by chemically coupling the adhesive to the metal oxide layer. Silane-based primers are effective for steel, aluminum, and stainless steel substrates. Apply primer in a thin, even coat and allow to dry according to the manufacturer's instructions — typically 15-60 minutes at room temperature. Bond within 4-8 hours of priming for best results.
Rubber surfaces require cleaning and activation to ensure good adhesive wetting and chemical bonding. Molded rubber parts carry surface contaminants from the molding process — mold release agents, wax bloom, and surface oxidation — that must be removed before bonding.
Wipe the rubber surface with a compatible solvent (MEK or toluene for most rubber types — test compatibility first). For thick rubber parts, abrade the bonding surface with 80-120 grit sandpaper to remove the molding skin and expose fresh rubber. The abraded surface should appear uniformly dull without glossy areas. Remove all abrasion dust with a dry brush or clean cloth.
For difficult-to-bond rubbers (EPDM, silicone, fluoroelastomer), apply a specialized rubber primer to the prepared surface. Rubber primers typically contain reactive chemicals that modify the surface energy and create chemical bonding sites for the adhesive. Apply primer thinly and evenly — excess primer can actually weaken the bond. Allow the primer to dry completely before applying adhesive. For EPDM rubber, chlorination treatment (applying a halogenation solution) is an effective alternative to primer for increasing surface energy.
Once both surfaces are properly prepared, follow these steps for reliable rubber-to-metal bonding. The specific adhesive type determines the exact procedure, but the general workflow applies to contact adhesive, PU, and epoxy systems.
Reliable rubber-metal bonding requires systematic quality testing, both during process validation and in ongoing production quality control. The three primary test methods are peel testing, shear testing, and visual inspection of the failure mode.
The 90° or 180° peel test measures the force required to separate a rubber strip from a bonded metal substrate. This test is particularly useful for evaluating contact adhesive bonds and flexible adhesive systems. A good rubber-metal bond should show cohesive failure in the rubber (rubber tears rather than the adhesive releasing from either surface) rather than adhesive failure at the interface.
Lap shear testing measures the adhesive bond's resistance to sliding forces parallel to the bond plane. This test is critical for structural rubber-metal assemblies subjected to shear loads in service. Results are reported in N/mm² (MPa) and should meet or exceed the adhesive manufacturer's published specifications. For reference, a well-bonded neoprene contact adhesive joint typically achieves 5-10 N/mm² shear strength, while PU and epoxy joints achieve 10-25 N/mm².
When a test sample fails, examine the failure surfaces to identify the failure mode. Cohesive failure (rubber tears, leaving rubber on both surfaces) indicates good adhesion — the adhesive is stronger than the rubber itself. Adhesive failure at the metal interface indicates poor metal preparation or primer failure. Adhesive failure at the rubber interface indicates poor rubber preparation or incompatible rubber-adhesive combination. Mixed-mode failure suggests partial contamination or uneven surface preparation.
Step-by-step instructions for applying contact adhesive in industrial settings — surface preparation, application methods, drying time, and troubleshooting weak bonds.
Read More →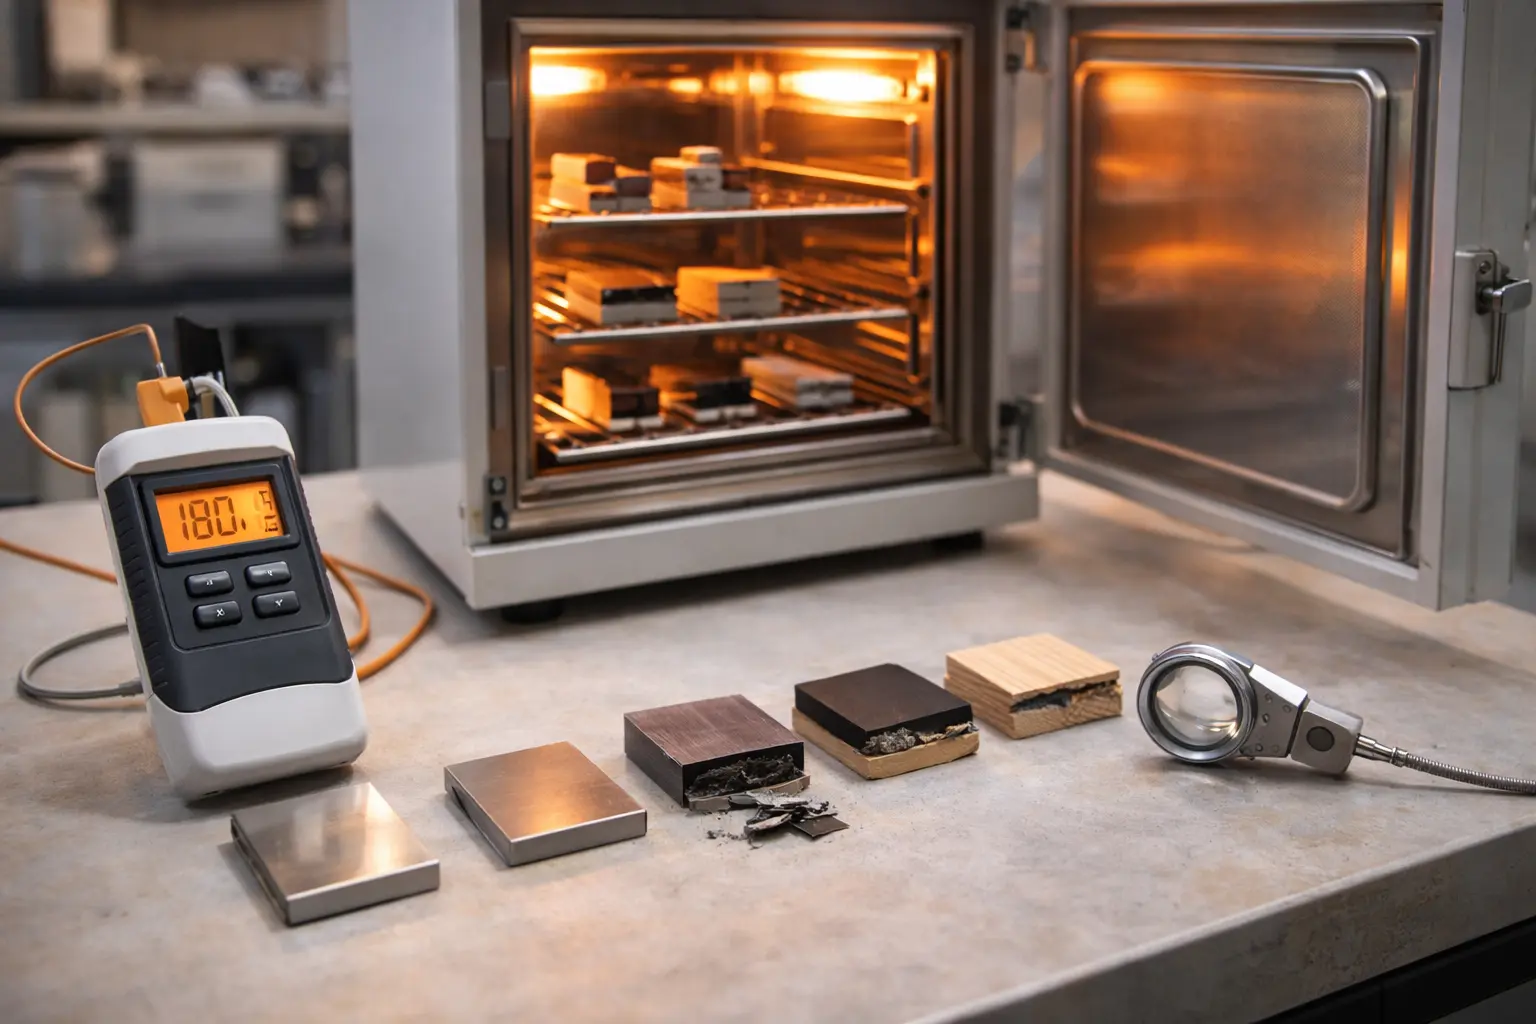
Guide to heat resistant adhesives for industrial use — temperature ratings, adhesive types, application methods, and selection criteria for high-heat environments.
Read More →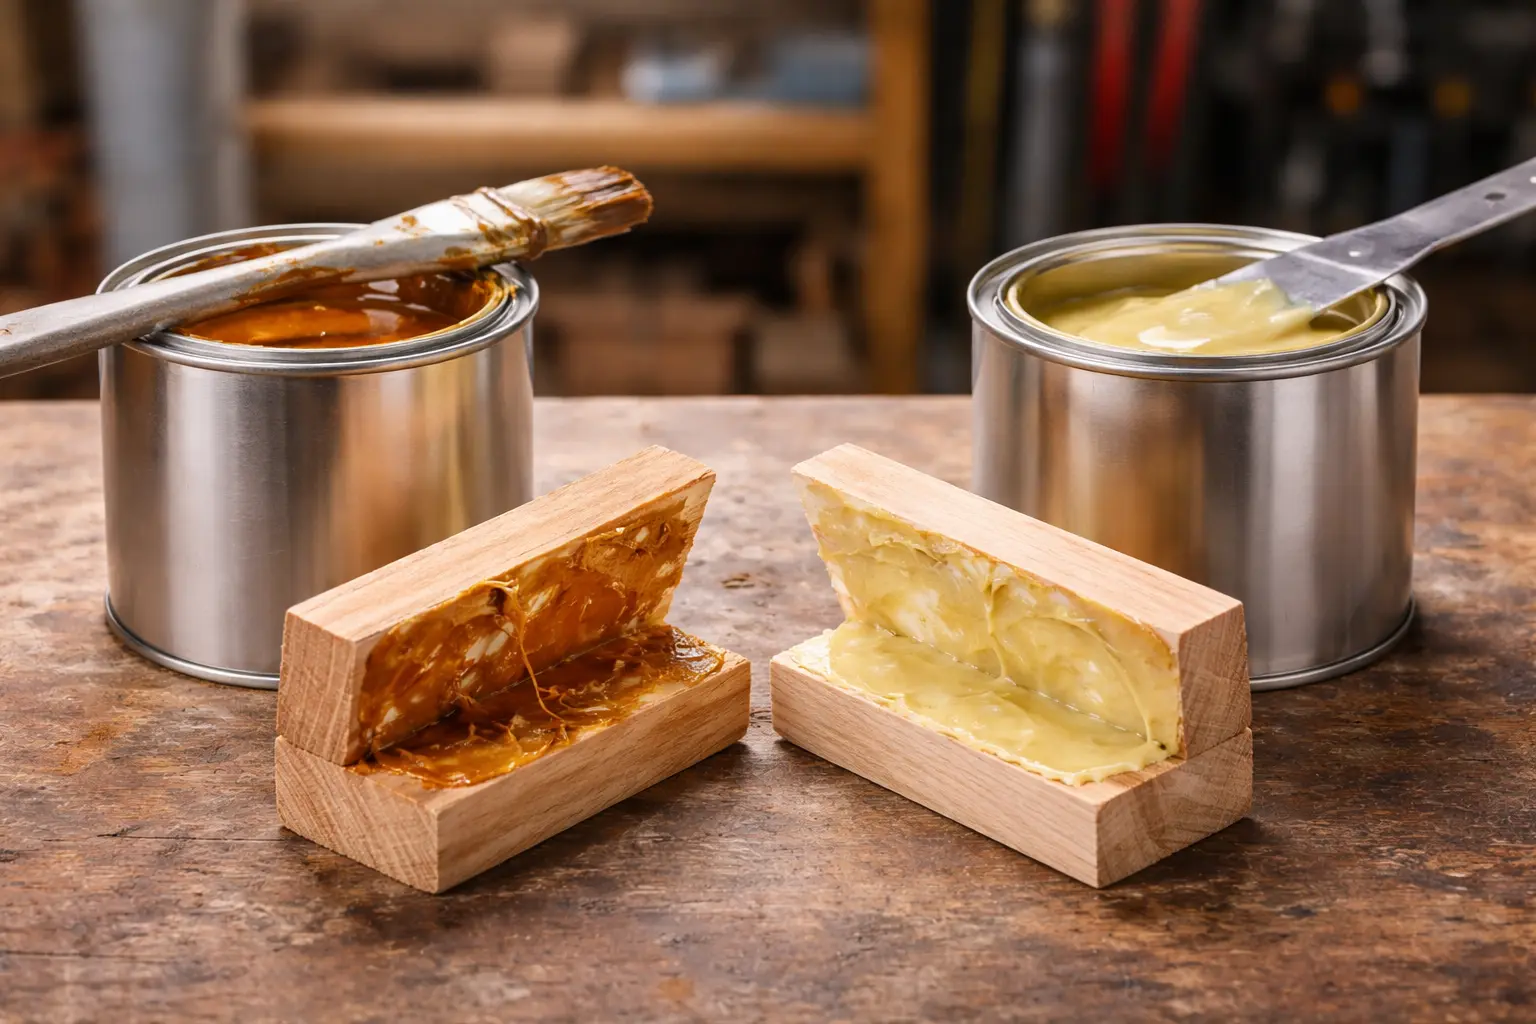
A detailed comparison of neoprene (CR) and SBS contact adhesives — covering bond strength, heat resistance, cost, and ideal applications for industrial buyers.
Read More →ChinaGluePro manufactures neoprene contact adhesives and PU adhesives suitable for rubber-to-metal applications. Contact our technical team for product recommendations.